Nasi Ayam a.k.a Chicken Rice, A South East Asian Speciality

 There are 4 components to Nasi Ayam. However, it is one of the easiest recipe in this site. The 4 components of Nasi Ayam are :
1) Chicken Soup
2) Chilli Sauce / Curry
3) Chicken Rice
4) Fried Chicken

Now let's go to the recipe to make these components and enjoy the yummy taste of this famous dish in the South East Asia.

 1) Recipe Chicken Soup

Oil - 1 Tbsp
Ginger - 2 or 3 inch sliced thinly
Chicken - 1/2 kg of Medium cuts 
Salt - apinch
Water - enough to keep aside for a soup as well as to cook the rice later. roughly 1 liter should be more than enough.

In a heavy bottom pan, pour the oil and saute the ginger till golden brown. This is to make the stock fragrant. Add the water and let it come to a rolling boil. Add Salt and the chicken and let it cook till tender.
This should take about 15-20 minutes.
Keep aside a bowl of soup and add 2 or 3 soup leaves.
Save the rest for the chicken rice.

2) Chilli Sauce / Curry
 
In a blender, place the following and blend well.

Young Red Bell Pepper Chilli - 10 or 15 deseeded
Tomato - 1 medium
Shallots - 3 or 4 medium
Garlic - 10 or 15
Vinegar - 1 or 2 Tbsp
Salt - a pinch
Sugar - 1 Tsp


This sauce is spice and if the spice is too much to handle, add water t o make it less concentrated as required.
Take 1 bowl and keep aside and keep the remaining in the blend the marinate for the chicken.

3) Chicken Rice

Remember the chicken stock we kept aside earlier?
That will be used to cook the chicken rice.

Basmati Rice - 2 Cups
Chicken Stock - 3 Cups
Salt - as required

Cook in a rice cooker


4) Fried Chicken
In the blender where the chili sauce is reserved earlier, add the following and blend well;

Black Pepper- 3 or 4 Tbsp
Dark Black Soy Sauce - 8 or 10 drops
Light Soy Sauce - a few drops
Chilli Sauce - 1 Tbsp

Marinate the chicken in it and leave for 5 mins.

In a pan, add 2 Tbsp of oil and fry the chicken till golden brown


Now, all the components of your Chicken Rice or Nasi Ayam is ready. Enjoy and if you really did, leave me a comment and let me know how it went :D


Chocolate Custard Eclairs

Most of the shops carry Eclairs that are filled with Creme Pattissiere. The recipe I tried out, recommended a fresh cream filling. However, I was out of heavy cream. Therefore, I decided to use a custard filling instead.
This recipe is from the book Success With Pastry, by Catherine Atkinson. I have used the book version of choux pastry and the chocolate topping. The custard recipe is from my pineapple flan recipe.

Choux Pastry
65grm plain flour
a pinch of salt
50 grm butter, diced
150 ml water
2 eggs slightly beaten (you may not need all of it)

Pre heat oven to 200 deg C
Grease baking sheet with butter and keep aside

Sift the flour and salt
In a heavy bottom pan, heat the butter and water gently till the butter melts. Ensure that you do not bring this to boil before the butter has completely melted.

Increase heat and bring to a rolling boil.
Remove pan from the heat and add the flour to it immediately
Stir vigorously with a wooden spoon or spatula till the flour is fully incorporated into the liquid
Return this to a low heat.
Beat the mixture till it comes off easily from the sides of the pan.
remove from heat and cool for 2-3 mins

Add the beaten eggs slowly, incorporating after each addition, till you get a smooth, shiny paste which is thick enough to hold its shape. You need not use the entire mixture for this.

Transfer this pastry into a piping bag and pipe onto the baking sheet to desired length.
Use a wet knife to cut off ends.

Bake for 25-30 mins until golden brown. The pastry would puff up.
Remove from the oven and make a slit in the middle, allowing the heat to escape.
Bring your oven temperature down to 180 deg C and cook this for a further 5 mins.

Keep aside and cool.

Custard
This custard is best when you make it the day before and keep in the fridge to chill.

500 ml milk
90 grm powdered sugar
90 grm powdered sugar (this is not a repetition)
2 eggs - yolk and white seperated
3 tbsp custard powder
1 tsp vanilla essence 

mix the cornflour in a 3 tbsp milk.
add the egg yolk and mix well.

combine the rest of the milk and 90 grm sugar in a heavy bottom pan.
add the cornflour mixture.
stirring continuously, bring the above to boil.
you should get a smooth consistency and your custard to ready to removed from heat if it coats the back of a spoon nicely.

add vanilla essence and keep aside to cool


Beat the egg whites well till soft peaks form.
Add in the other 90 grms of sugar and mix well.


Add this to the custard mixture and stir well till totally incorporated


Keep this mixture in the refrigerator till required. Will last for a week or so.

Fill this custard in a piping bag and pipe into the eclairs till they are full.


Melt chocolate (about 100 grms) with 2 tbsp water in microwave or over the pot of boiling water. Add 20 grms of butter and mix well.

Spoon or pipe the mixture onto the eclairs
You can serve this once done or you can serve this cold.

These needs to be eaten within 24 hrs


Mango and Coconut Ice Cream

Mango and Coconut Ice Cream

This is a recipe I tried out from Sanjeev Kapoor's Party Cooking Book. Turned out delicious  but with a little zilch. The ice cream turned out to be a little icy. I believe this could be solved if you use full cream milk instead of low fat or normal milk which the book suggests.

2 Med ripe mangoes
1 cup Coconut Milk
2 tbsp Grated Coconut
2 tsp Lemon Juice
1 cup Full Cream Milk
3 tbsp Cornflour
1/2 cup Sugar
1/4 tsp Salt
2 Egg Whites
1/2 Cup Cream


Mix the coconut milk and 1/2 qty of full cream milk in a saucepan

mix cornflour, sugar and salt with the remaining full cream milk and add to the saucepan.

cook over low heat, stirring continuously till the mixture is thick. You should be able to see a layer form on the back of your spoon when you lift your spoon

Stir in the grated coconut into the saucepan and set aside to cool. This will take about 5 mins.

Meanwhile, Peel Mangoes and puree the pulp with lemon juice in a blender.

Add this to the saucepan once it is cool.

Pour this mixture into an airtight container and keep in the freezer till it is half frozen. Depending on the temperature in your freezer, this should be around 2-4 hrs.

Check once in a while to make sure you do not freeze this completely.

Once you are ready with your half frozen mango mixture,

beat the egg whites till they form soft peaks and beat the cream separately till thick.

Transfer the half frozen mango mixture to a bowl and fold in the ehh whites followed by the cream until you get a smooth mixture.

pour it back into the air tight container and freeze for a further 3 hours.

Remove from the freezer and beat tis mixture till it is smooth again.

Return to freezer.

Your mango and coconut ice cream will be ready by the next 6 hrs at most.

Chocolate Cake with Semi Sweet Chocolate Butter cream Frosting

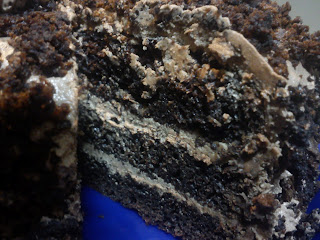
I was feeling too lazy to start from scratch for this but at the same time I wanted to make something. So I took the PillsBury Chocolate Cake mix and made the cake. Then I thought, why not try using my chocolate butter cream frosting and see how it tastes like. Usually I use cake mix when I am strapped for time and have visitors and they never get the frosting as well ;)

I cut the cake into 3 layers and placed the frosting (that was so yummy I could just eat it on its own :D( well, I did when I was scraping down the bowl)) on the layers and the sides. I had some leftovers which I got while I leveled the top for consistency. Crumbling them up gave a very Black Forest kind of look to the otherwise boring ,looking cake. A little twirl using the icing tool gave it the perfect look.


Another CupCake Success Story

I have been a huge fan of D C Cupcakes. Used to air on TLC channel and I really hope they come up with another season :D I'd say Sophie and Katherine have somewhat provided me with the initial nudge through their show to start on my cupcake baking experiments. Hence, their success story needs to be mentioned while I am at it.

As posted before, I am reading up a lot about cupcake success stories and I am seriously thinking about starting the series ;)... So here is the Success Story of DC CUPCAKES.

Cupcake Success Stories

Cupcakes saved my home! How I cooked up a plan to bake my family out of bankruptcy

That's not about me. It is an article I read recently about how Antonia Kime managed to turn around a disaster about to befall her family with Cupcakes. It is an inspiring article for me as I see myself in some aspects of the article. Maybe I should start a series of cupcake success posts here... Hmmm lemme think about it and do some research for that, yeah!

I started baking as a hobby and was only too comfortable baking for my relatives till I decided just recently that I need a bigger platform. I just love the comments from those who love my cupcakes. The feeling is just too good to be contained within the confines of four walls. And, if more people get the kick out of licking the butter cream off the cupcakes and indulging in life's littlest sin, what gives!   

Actually this wave of cupcakes is like never ending. It has been around for years now and yet what you could do with a simple recipe with a cupcake is tremendous. New flavors, new frosting, new designs yet the same feeling of happiness when you gorge on a cupcake.  

Yummm......

To all those who love baking... don't stop coz you are making those who love your cakes happy :D

Cake Pops and Cake Bites

Have been lazy for a while since my last post largely because of my health. The weather is such and I have been having on and off fever, sore throat and what not. However, I have been experimenting with cakes as well. I tried out cake pops and cake bites with my usual cake and cup cake recipes.

Cake Bites are cute miniature cakes that are presented as bite sized pieces. Actually I was so in love with this idea that I wanted to try it out and I did. I made vanilla cake, butter cream frosting and melted some chocolate. With some colored sugar sprinkles and sugar pearls, I was good to go.

Look at what I made.

Mini cupcakes dipped in melted chocolate and sprinkled with colored sugar pearls

Melted Chocolate and sugar pearls

Fresh out of oven. The same cake recipe but made two versions; 1 - mini cupcakes, 2 - Cake Bites.


Oh! It can get messy when the bites are so small to work with!

I wanted a more uniform drips around the cake but they do look pretty yummy this way too. I guess imperfections have their own beauty as well


My Sea Princess

I was browsing a lot of cake picture to get some idea for my next project. Finally, I decided on a simple yet a little difficult one; Sea Princess. Initially I wanted to do a mermaid sitting on a rock watching the fishes go by but the mermaid tail kept breaking. So I decided, I will just make it a simple princess instead of a mermaid. By the time I realized that I need to make the sea princess a little smaller, it was too late. She ended up taking up much more space than I had anticipated. As such, one of the starfish got covered by her skirt :(. Still, I loved the end product.

Here are the pictures of my second cake project.

Seashells Attached to Walnut and Coffee Cupcake  
Getting My Sea Princess Ready

Adding the little details

Almost Complete
Making the Sea Effect with Butter Cream Frosting and added 2 lil Fishes Jumping OUt of Water and 2 Starfishes on the shore

Another view of the above
Placed the Sea Princess, Her Bag, Her Crown and Her Umbrella at the shore. Added Flowers to Her Hair as well

My Daughter's Name is Written

Almost Complete View

Another View

Sea Princess Complete

Another View

Top View

You Will Also Like

Related Posts Plugin for WordPress, Blogger...